Comfort and Fit
This chapter will help you learn how to wear and adjust your ROG XREAL R1 glasses for the best comfort and display experience.
1. Wear the Glasses and Make Sure the Image Is Clear
-
Connect the glasses to a compatible device that supports DP video output, and make sure the image is displayed properly.
-
After putting on the glasses, check the following:
- The image is centered in your field of view.
- The full display area is visible.
- There is no obvious cropping or image shift.
- If the image position or clarity is not ideal, follow the steps below to adjust the glasses.
2. Adjust the Wearing Position
If the image is not centered, or appears too high or too low, try adjusting the temples or replacing the nose pad.
Adjust the Temples
Vertical angle adjustment: The temples support 3 levels of vertical adjustment. You can gently move the temples up or down to find a comfortable wearing angle and view the full image clearly.
When wearing the glasses for the first time, we recommend starting with the middle position (0°), then fine-tuning the angle based on the image display and your personal comfort.
Replace or Adjust the Nose Pad
The glasses come with 3 sizes of nose pads (S/M/L), with the M size installed by default. Choose the appropriate size based on the height of your nose bridge. A suitable nose pad helps improve image clarity and overall wearing comfort.
When installing or replacing the nose pad, align it with the glasses in the direction shown and insert it into place.
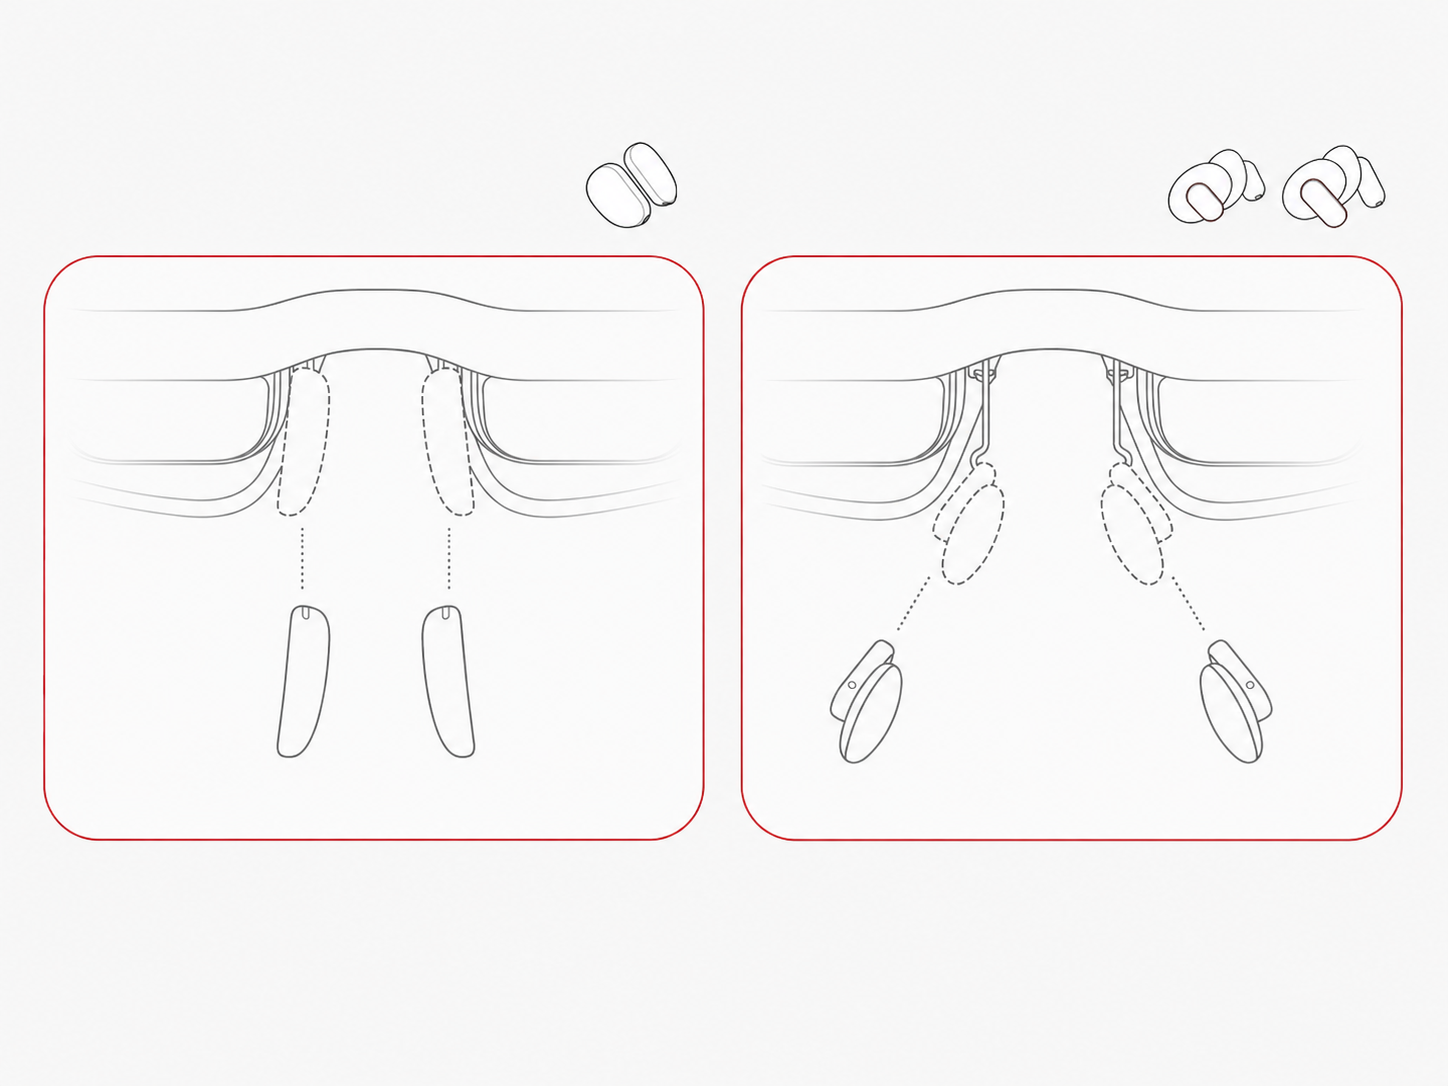
If the image appears too high or too low, try replacing the nose pad with a different size. The S-size nose pad positions the glasses relatively higher, while the L-size nose pad positions the glasses relatively lower.
| Nose Pad Size | Suitable For |
|---|---|
| S (Small) | Higher nose bridge |
| M (Medium) | Medium-height nose bridge (default) |
| L (Large) | Lower nose bridge |
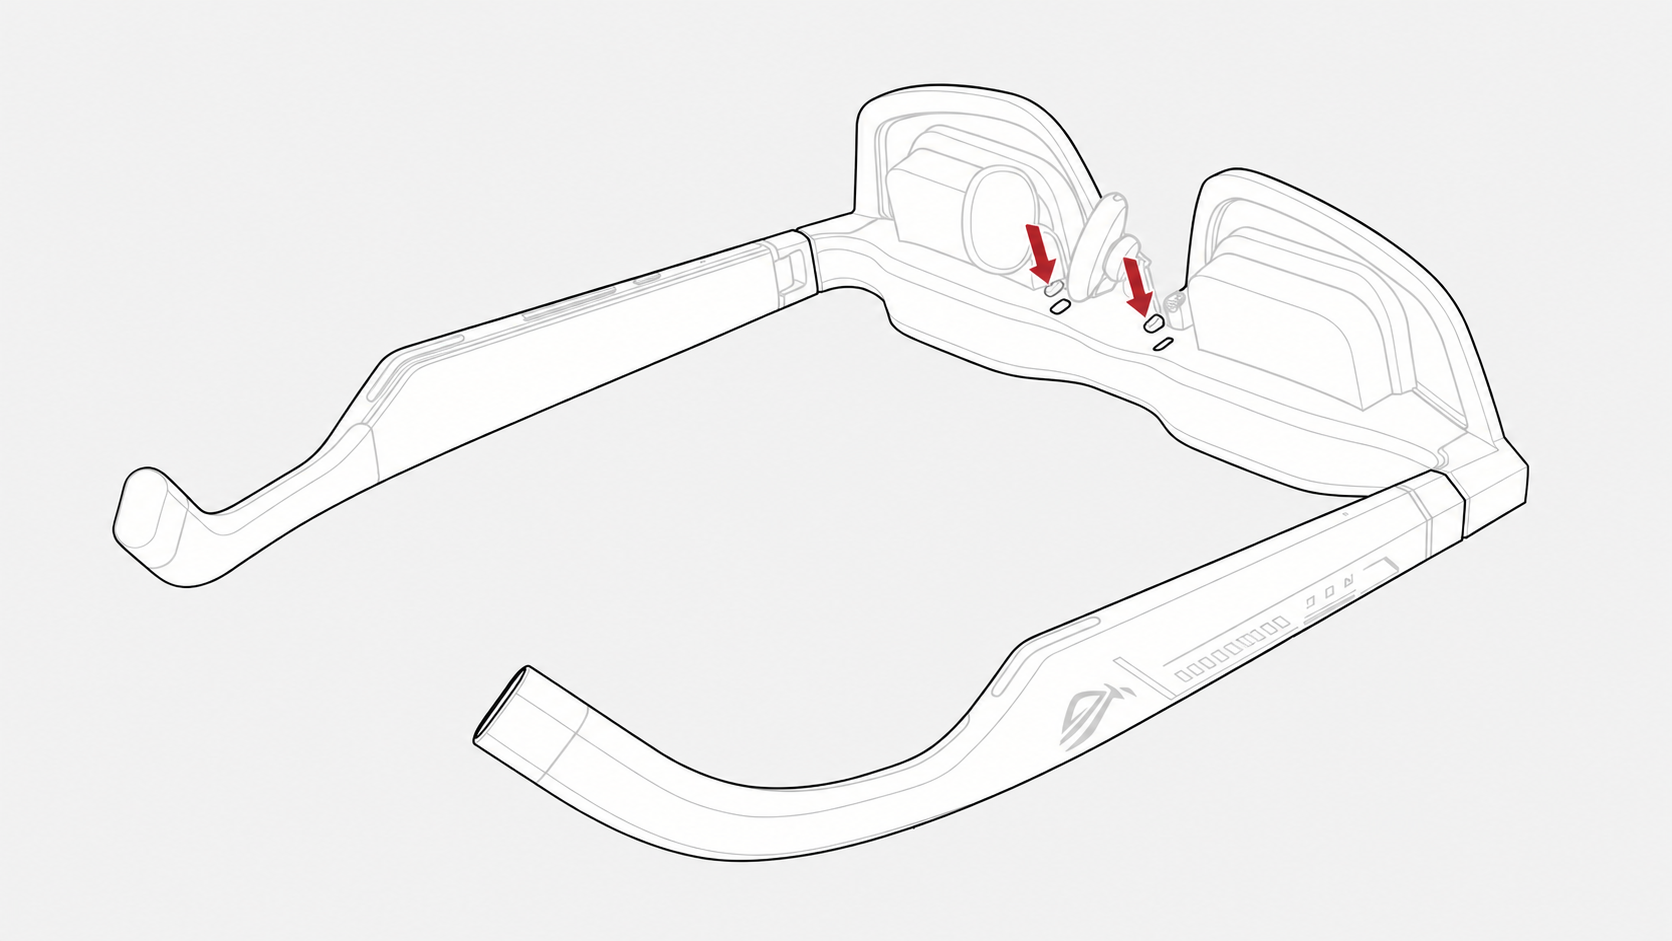
Install Prescription Lens Inserts (If Needed)
- Place the glasses on a stable, flat surface with the nose pad facing upward, then remove the rubber dust cover near the nose pad holder.
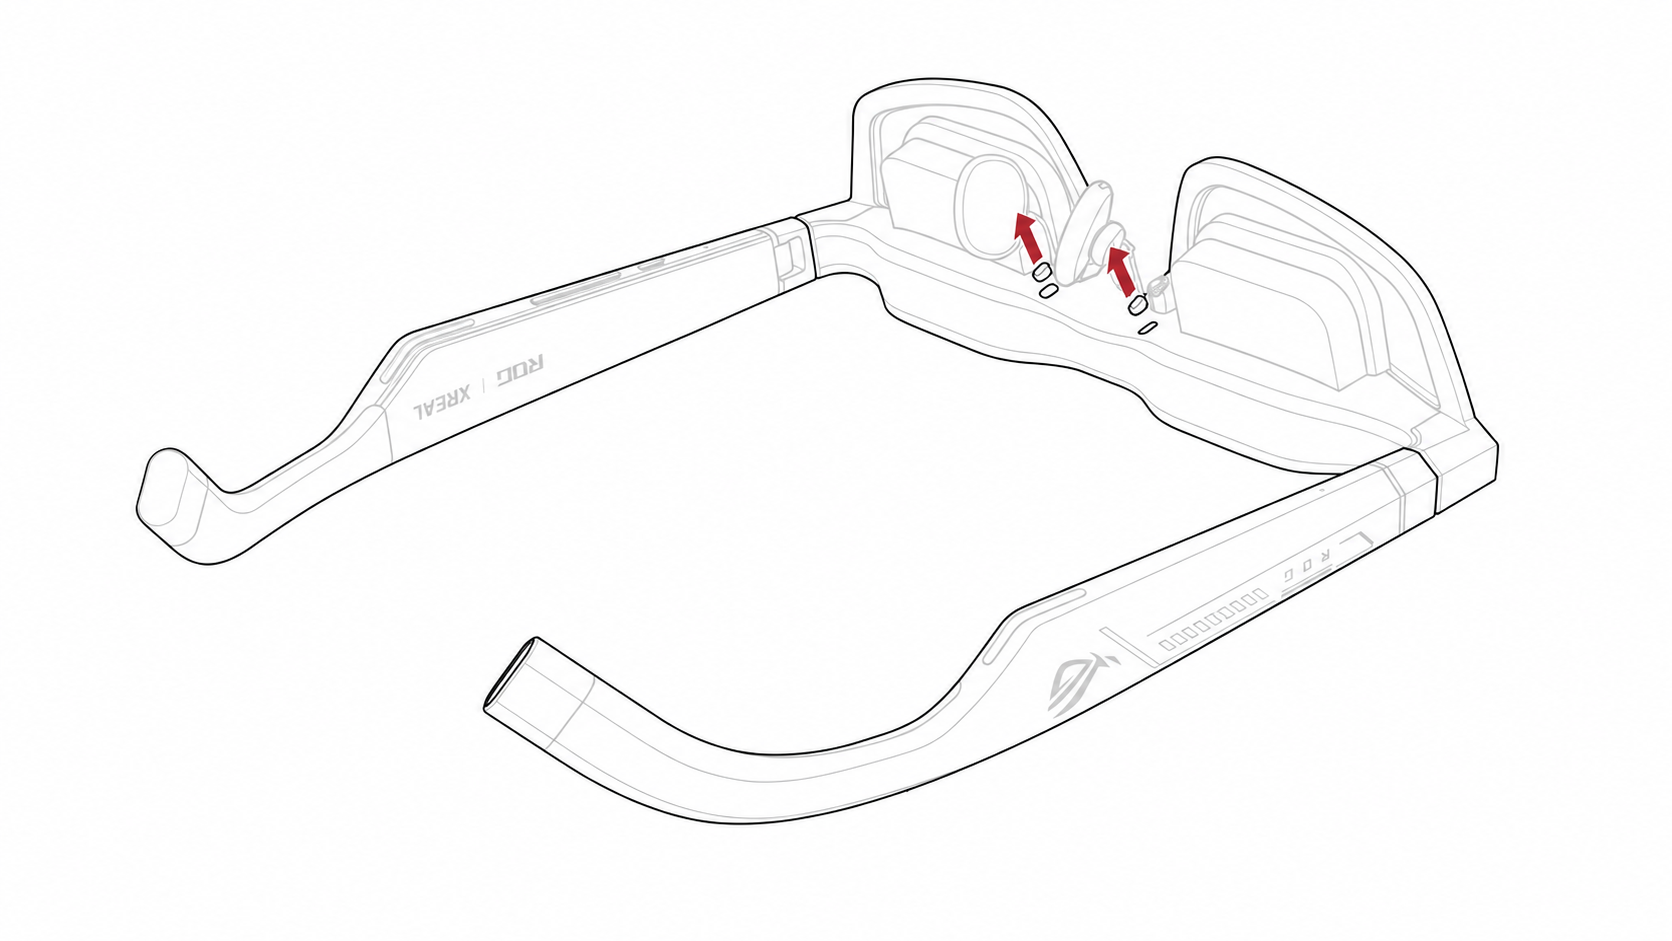
- Align the fixing clips of the prescription lens insert with the corresponding openings on the glasses, then press down gently to secure the lens insert.
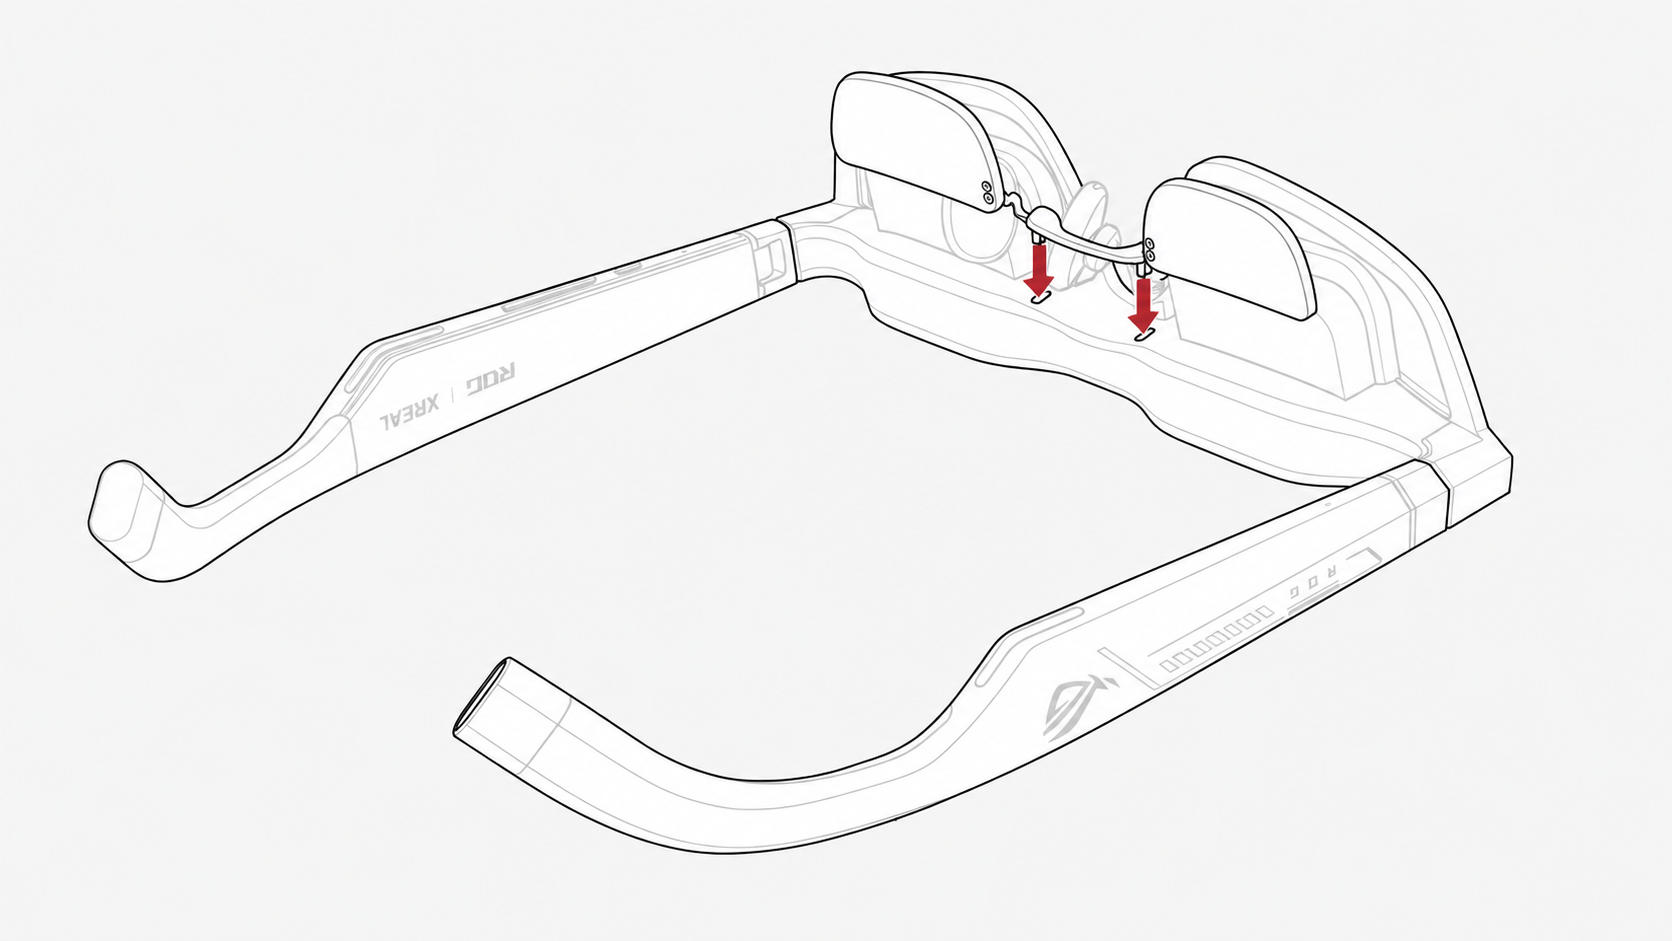
- To remove the prescription lens insert, simply detach it from the glasses.

- Reinstall the rubber dust cover.
After installation, make sure the lens insert is firmly secured and check the image alignment again.
If you are not sure how to install the prescription lens insert, we recommend contacting e-commerce customer support or visiting a professional optical store for assistance.
3. Test the Button Functions
Before normal use, make sure all buttons work properly.
- Test the 「Menu Button」: Press the 「Menu Button」 once to switch between 「Follow」and 「Anchor」 modes. Double-press the 「Menu Button」 to open the OSD menu.
- Test 「+/-」: Press 「+/-」 once to open the 「Quick Menu」.
4. Start Using
After completing the adjustments above:
- Make sure the image is stable and clear.
- Make sure the glasses fit comfortably.