Quick Guide
This guide introduces the essential buttons and OSD controls on XREAL 1 Pro+ so you can quickly start using your spatial screen.
Get Familiar with the Buttons
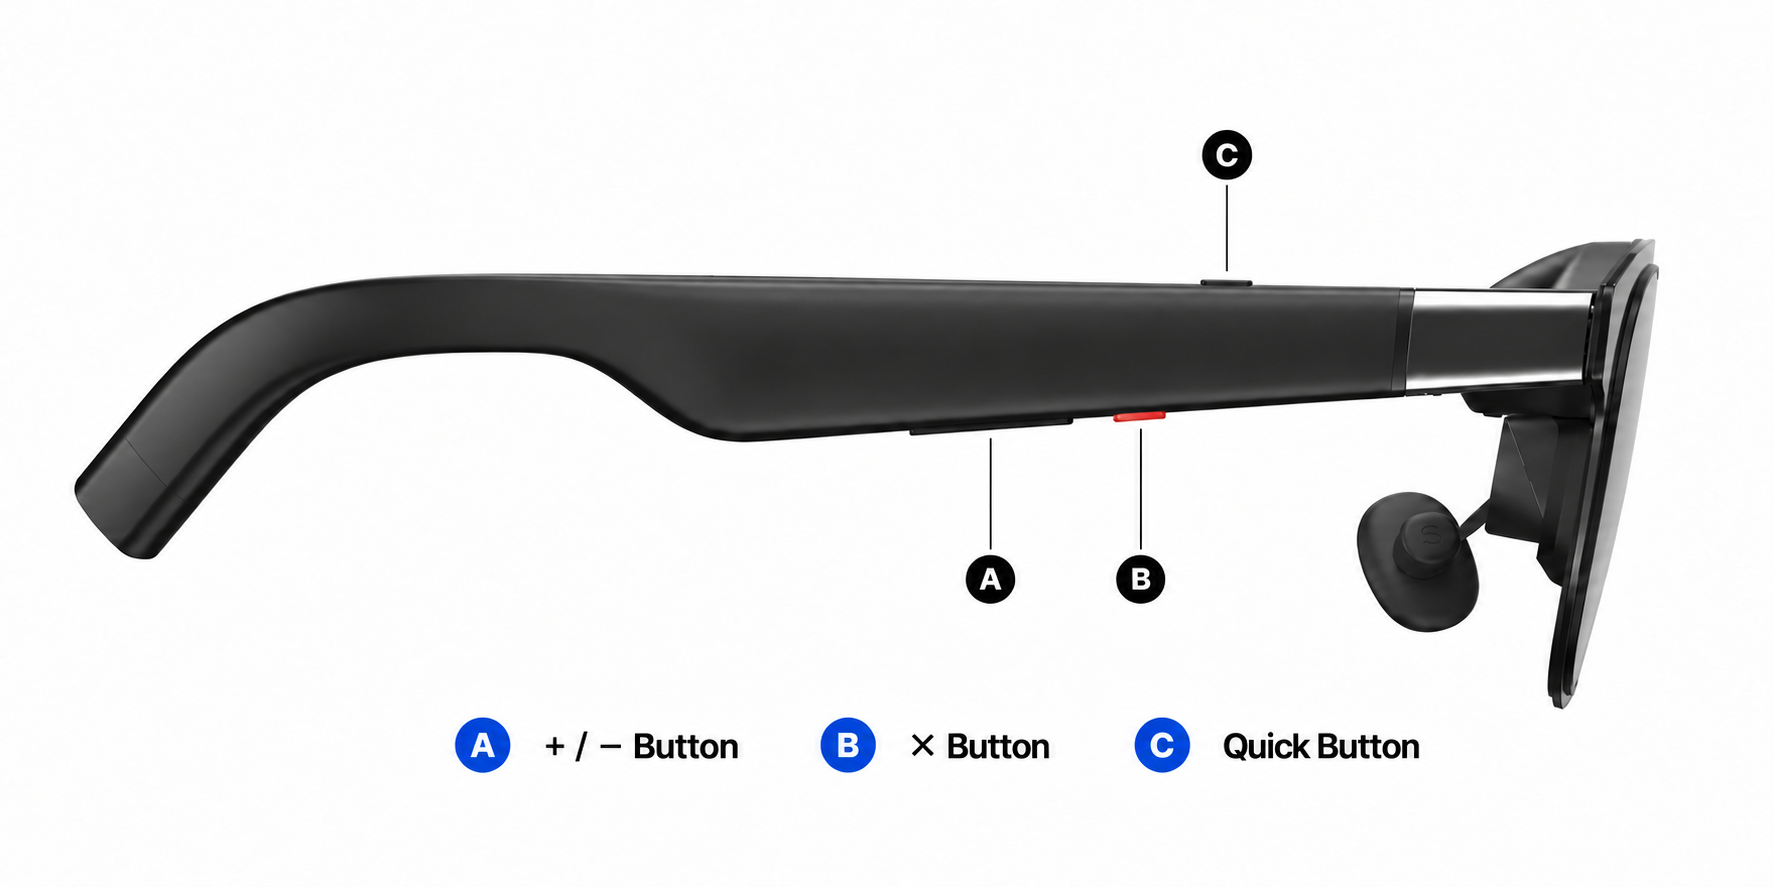
Switch Viewing Modes
When the OSD menu and Quick Panel are closed, click 「X」 to switch between:
- 「Follow」: the screen moves with your head.
- 「Anchor」: the screen stays in a fixed direction using the glasses' built-in 3DoF tracking.
Recenter the Screen
Face the direction where you want the screen, then press and hold 「X」 to bring it back in front of you.
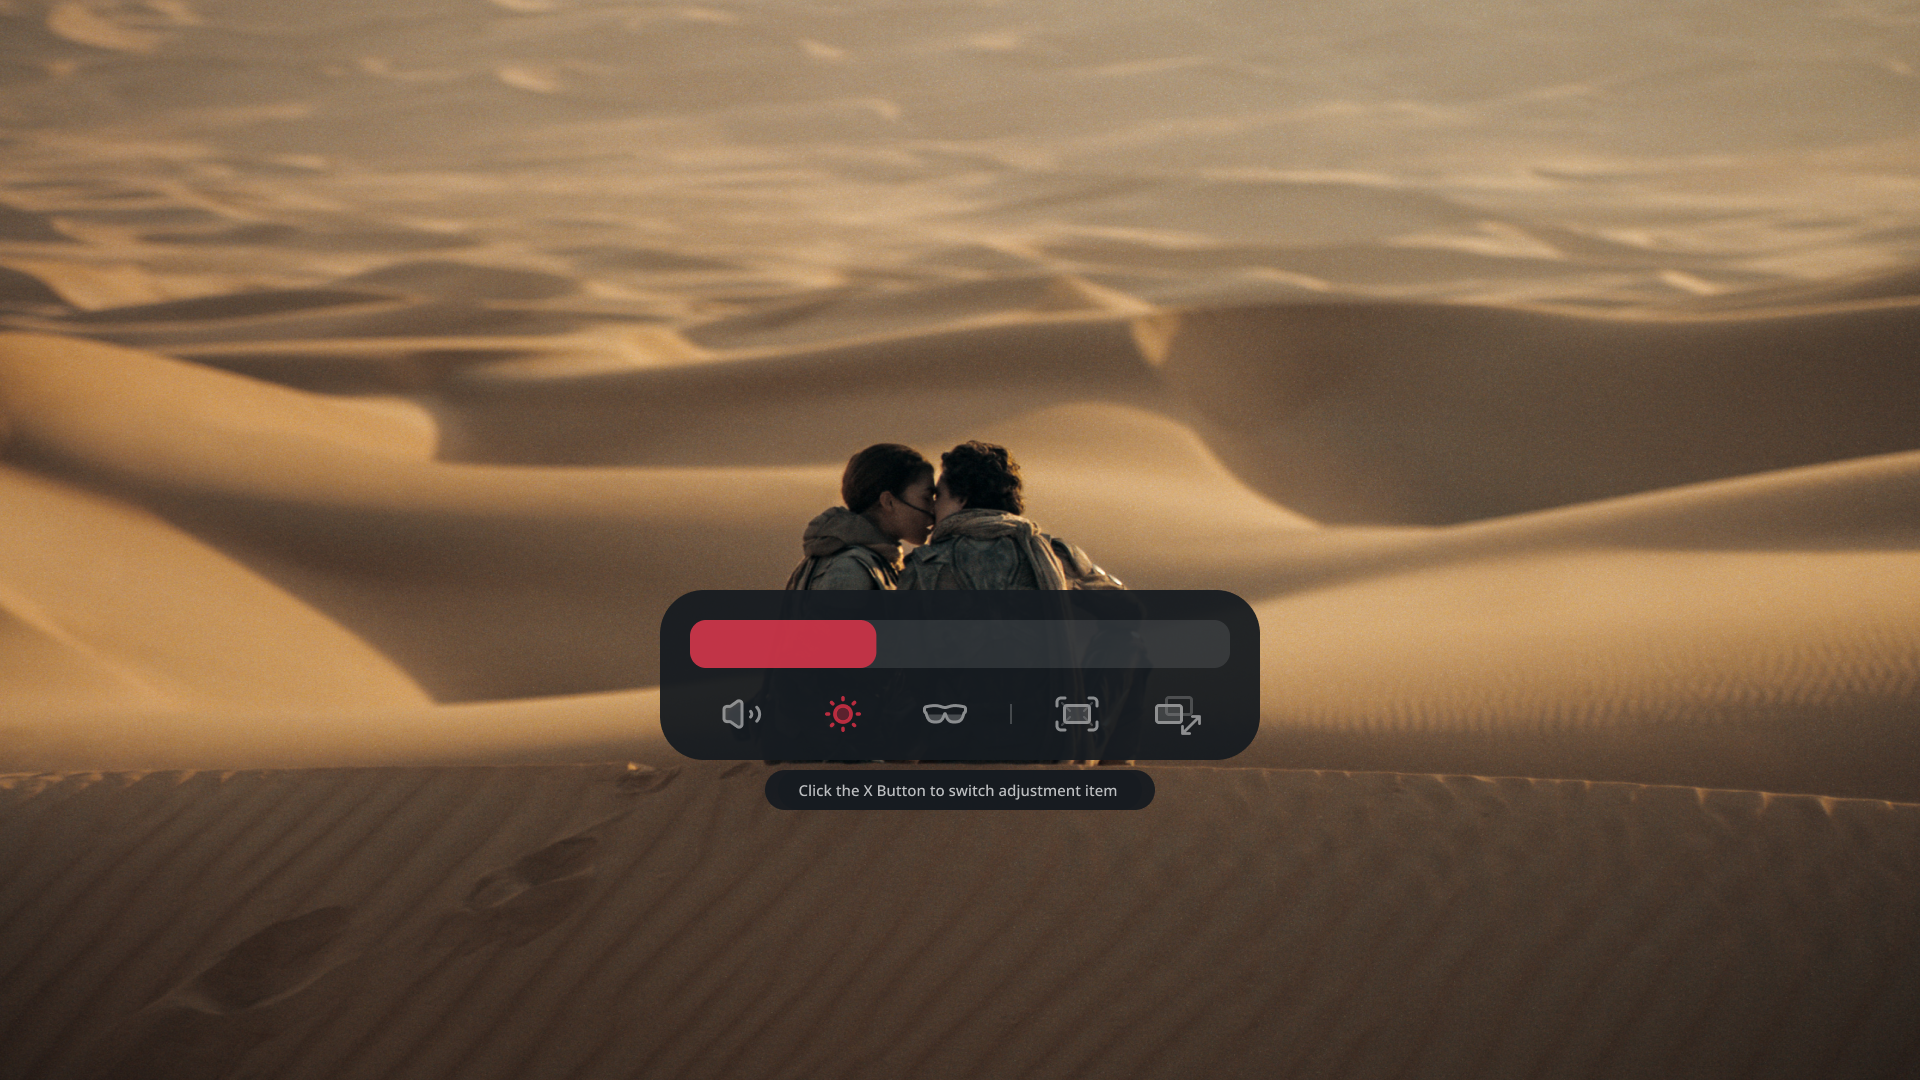
Adjust the Picture and Volume with the Quick Panel
- Click 「+」 or 「−」 to open the 「Quick Panel」.
- While the panel is open, click 「X」 to switch between brightness, volume, electrochromic dimming, screen size, and screen distance.
- Use 「+」 / 「−」 to adjust the selected item. Press and hold for continuous adjustment.
See Display and Sound for more display and audio options.
Use the Quick Button
The default actions are:
- Click: 「Display Mode」. Each click cycles through 「Standard」 → 「Cinema」 → 「Reading」 → 「Standard」.
- Press and hold: 「Dynamic Range」. Each long press switches between 「AI HDR」 and 「SDR」.
- Double-click: 「None」. No function is assigned by default.
Customize supported actions in 「Settings」 > 「Quick Button」. Connecting XREAL Eye automatically assigns click to taking a photo and press and hold to recording video. After disconnecting XREAL Eye, clicking the button displays “XREAL Eye not connected.” To use other functions, reassign the button in 「Settings」 > 「Quick Button」. See Learn the Controls.
OSD Menu
Double-click 「X」 to open the OSD (On-Screen Display) menu. Its three main tabs are 「Spatial Screen」, 「Display and Sound」, and 「Settings」.
Menu Navigation
- Click 「+」 / 「−」 to move between options or adjust a value.
- Click 「X」 to confirm a selection.
- Double-click 「X」 to return to the previous level or close the menu.
On an adjustment page, double-clicking 「X」 saves the current value and returns. On an option-selection page, click 「X」 to confirm before leaving; returning without confirmation discards the unconfirmed choice.
See Settings for more menu instructions.
Language Setting
Open 「Settings」 > 「General」 > 「Language Settings」 to change the menu language.
Firmware Updates
Keep your glasses’ firmware up to date to get new features and improvements. Connect the glasses to your PC, then visit the XREAL firmware update website and follow the on-screen instructions to upgrade the firmware.
We recommend using Google Chrome for firmware updates.
Find the Serial Number
Open 「Settings」 > 「About」 > 「Device Information」 to view the device serial number (SN) and other available device information.
Connect and Adjust the Glasses
- Connect a compatible USB-C cable to the glasses and your source device.
- Put on the glasses. A virtual screen appears after the source recognizes the display.
- Adjust the nose pads and temple angles until the image is centered and comfortable.
- Use the 「Quick Panel」 to adjust brightness, lens transparency, and volume.
Your source device must support DisplayPort video output through USB-C. A USB-C port alone does not guarantee video output. If you are unsure, check the device specifications or ask its manufacturer.
For fit instructions, see Set Up and Fit the Glasses. If no picture appears, see connection and display troubleshooting.